Solved

Lobby counter configuration on the 'Element Designer'

  • 24 February 2023
  • 7 replies
  • 238 views

Badge +2

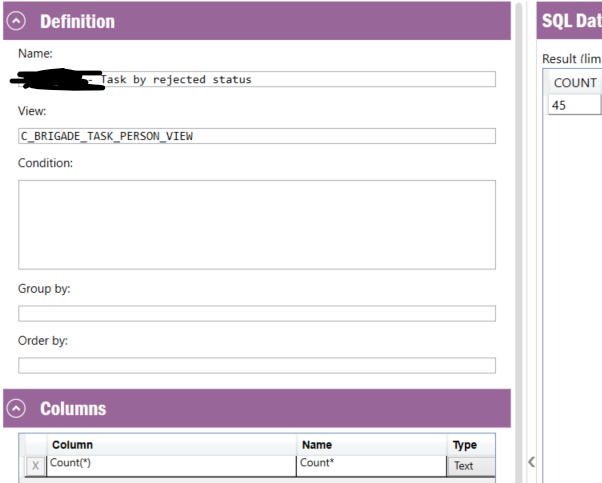
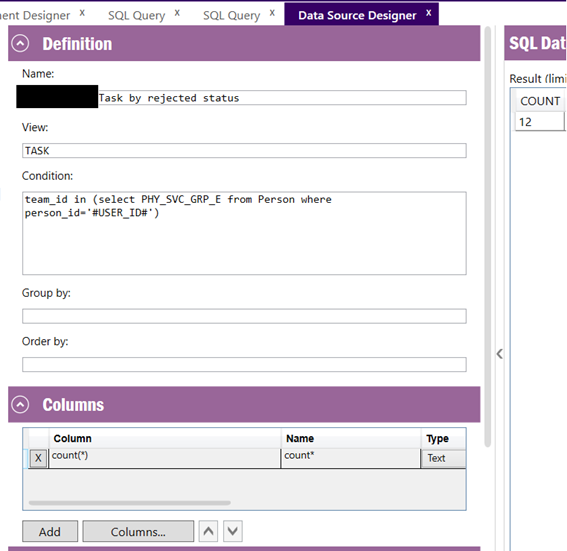
In order to create a counter element in a lobby, in the 'Data Source Designer' I need to do the following condition, which result count is '12':


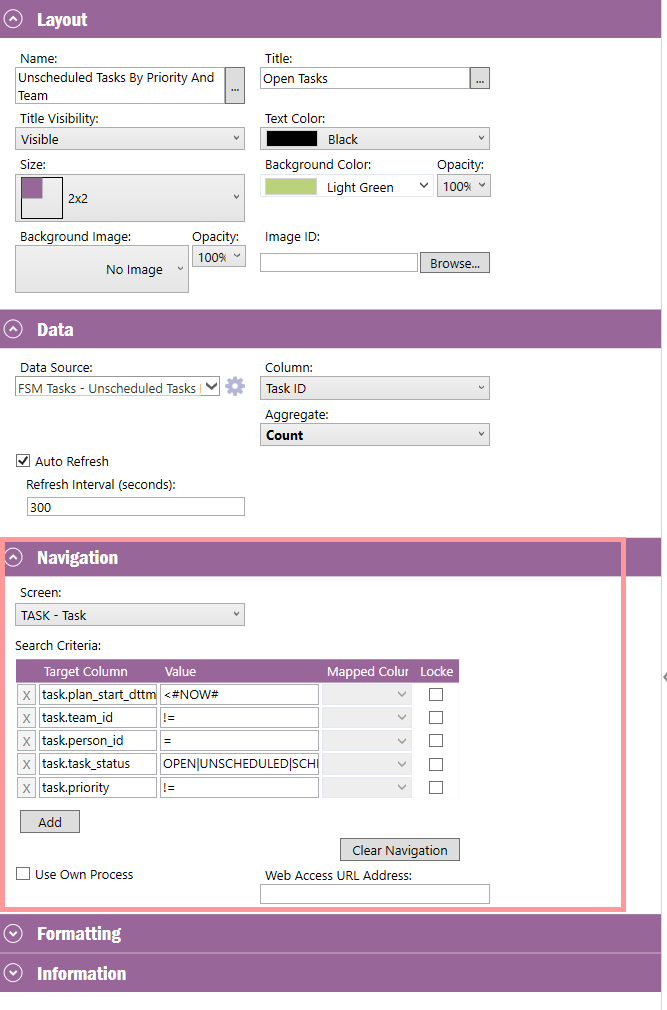
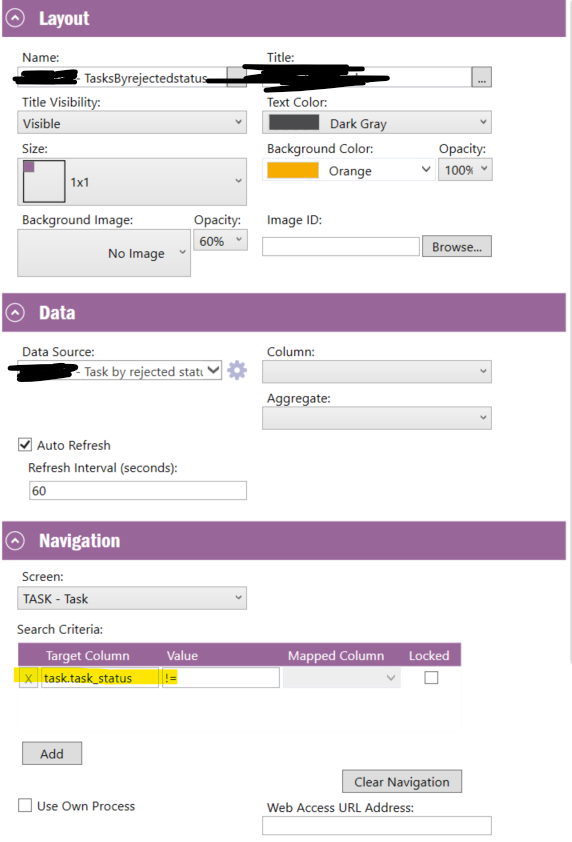
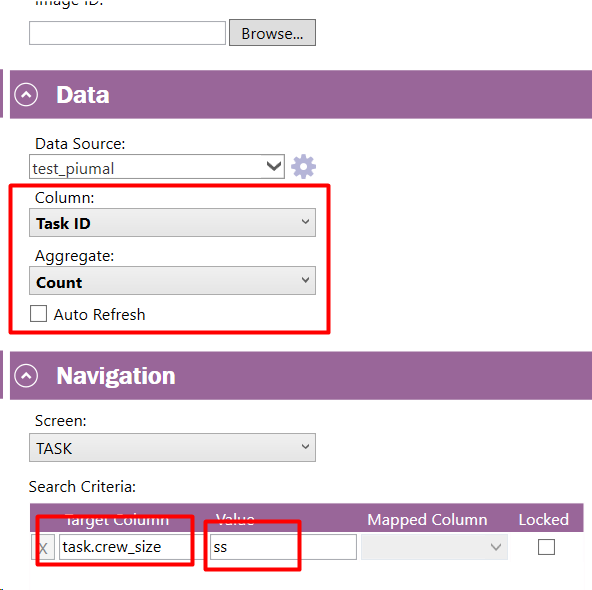
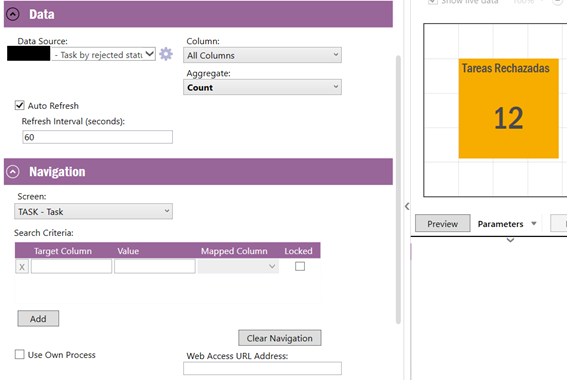
In the element designer I need a configuration, that would able in the WebClient by left clicking in the counter, to show the tasks that were selected by the prior condition (in this case the same 12 tasks).


Element Designer:


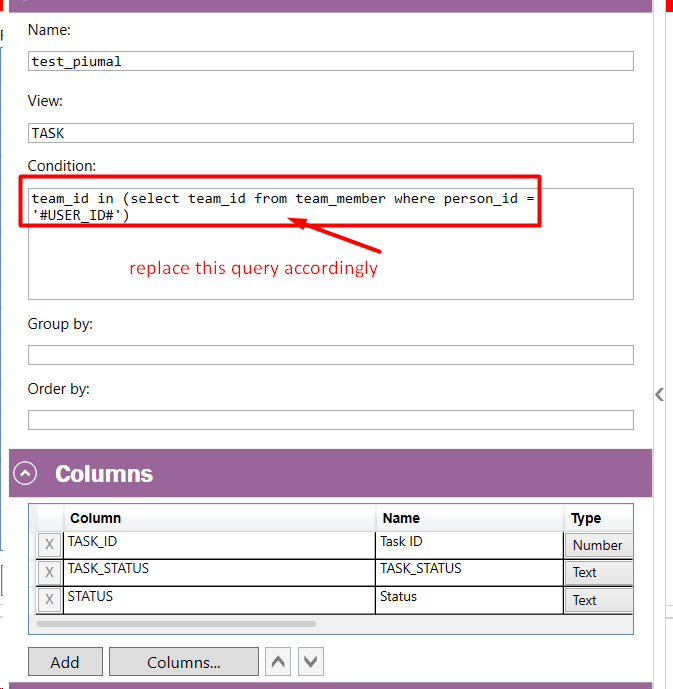
It's possible to reproduce the condition of the 'Data Source Designer', with a 'select' inside in the URL (in the 'Element Designer')?


Or there is another way to configure de element designer in order to show the same '12' tasks by clicking in the counter (knowing that its necessary to use a 'select' in the condition on the 'Data Source Designer'?

icon

Best answer by Pedro_Duarte 2 March 2023, 10:51

View original

7 replies

Userlevel 6
Badge +26

Hey @Pedro_Duarte 

Configure your navigation according to the logic you wish to have by adding the search criteria.

Example


Cheers!

Badge +2

Hello @Shneor Cheshin, thank you for your reply.

My problem here, is that I cant reproduce the query from the the Data Source Desinger (example: team_id in (select PHY_SVC_GRP_E from Person where persond_id=’#USER_ID#’) on the search criteria in the navigation.


Userlevel 6
Badge +26

Hey @Pedro_Duarte 

I suggest that you would create a custom view for that purpose.

For exampl:

CREATE VIEW C_MY_VIEW AS
SELECT COLUMN1, COLUMN2, COLUMNn....
FROM TASK T JOIN PERSON P ON T.TEAM_ID = P.TEAM_ID

Then in view, instead of task populate the view name.

In conditions do nothing, or just add the person_id condition (depends how you build the custom view).

In the navigation fields just add the person_id condition (depends how you build the custom view).


Cheers!

Badge +2

Hey @Shneor Cheshin ,

thanks for the reply.


I understood what you did, and I did something similar, however I need to click in the counter and open in the new page the same tasks that are in the counter.


My problem is what to put in the Navigation, knowing that the goal is to click in the counter for then to open the task list with the same tasks.


In WebClient what is happening when I click in the counter is that all the tasks that exist are being showed and not only the tasks from the view.


Example:

With no conditions in the view, 45 tasks are counted.


In the Navigation I have the following criteria:


The result is that in the Webclient, when I click in the counter, the task list that show up contains all the tasks that follow the ‘Search Criteria’, and not only the tasks from the view (that are only 45):


Do you know any way to configure the navigation, to make sure that when I click in the counter only the tasks that belong to the view that I mentioned in the first image, to show?

Userlevel 1
Badge +3

Hello,
There is a straightforward solution to this but I cannot remember that at the moment. However I can suggest the following workaround to this. 

Here are the steps

  1. Return required columns from the data source as shown below. You can change accordingly. Change into your query and columns accordingly.


  2. You need a specific field in the advance search in the task screen apart from the team id field for this to work. It can be invisible and virtual. Lets assume you have a column called “crew_size”.
    Then you setup your counter element to set a value to that column - crew_size.

    This will set a parameter value into the URL when opening the task screen via counter element. This is a trigger point for the next step

  3. Create a Client Script as shown below.
    var check = getControlValue('task','crew_size');
    var personId = getUserInfo('personId');
    if(check == 'ss')
    {
    var teamList = getDBValues('TEST_PIUMAL',personId);

    //format a string to have all the team_ids separated by a |
    // eg: TEAM_X|TEAM_Z|TEAM_Q
    var stringTeamList = 'XXXXXX'; //assuming this is the correct string with all teams
    setRowControlValue('task', 'team_id', stringTeamList);

    }

    You may have to loop through a list of teams returned for the particular user and generate a single string with pipe as a delimiter and then set that string to task.team_id as shown in the client script. 
    Client Script SQL:

    select team_id from team_member where person_id = '{0}'


  4. Add the created client script as AfterScreenLoad event in the Task screen in UI Designer.

Remember you have to have team_id and one extra column in the advance search area on task screen for this to work.

PS: You need to keep an eye on the performance levels

Badge +2

@eluxpiumal thanks!


This solution worked!

Userlevel 1
Badge +3

@eluxpiumalthanks!


This solution worked!

Would you mind set my answer as the solution, so it might help others to grab quickly


Thanks in advance.


Regards,

Piumal

Reply