

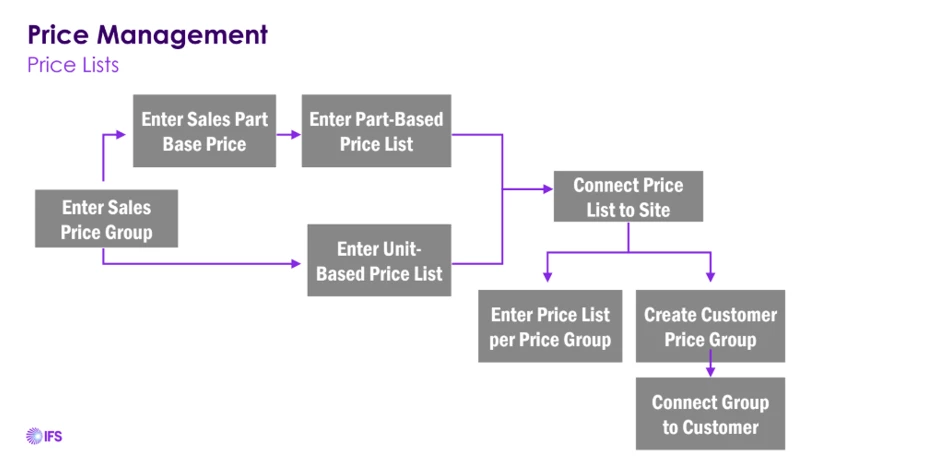
This diagram only illustrates the workflow steps and does not explain the logic and also in the video there are various price management techniques defined but not really the difference in the output is reflected so can you give a real world example showing the major difference.
