

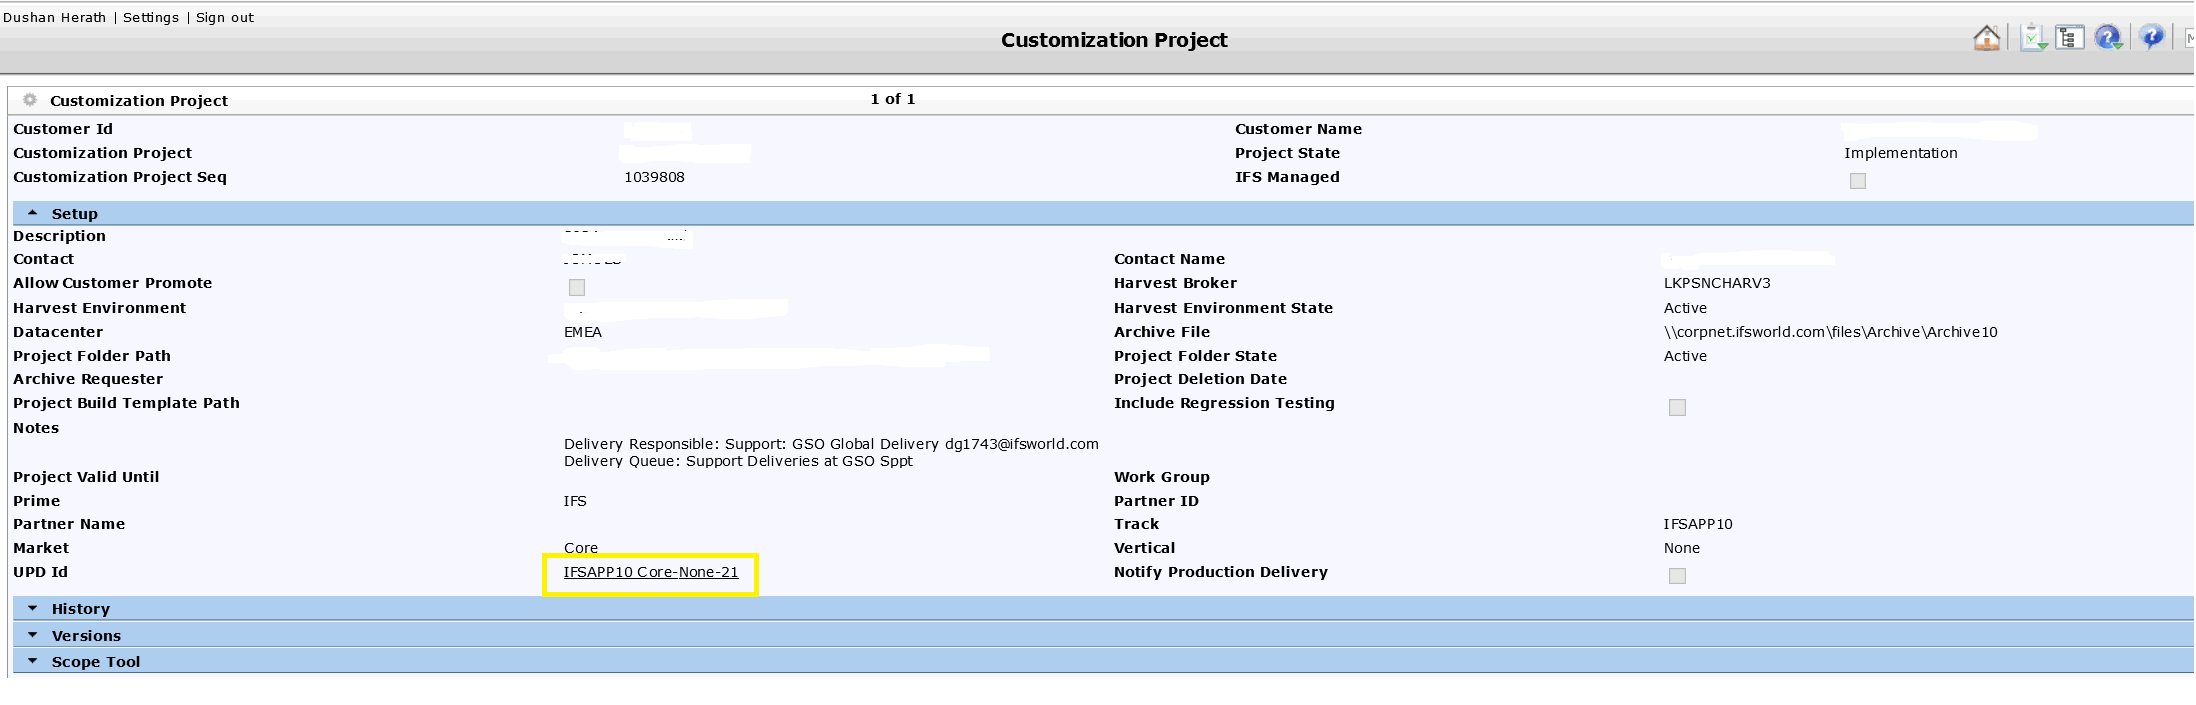
You can see this customer’s UPD ID is IFSAPP10 Core-None-21.
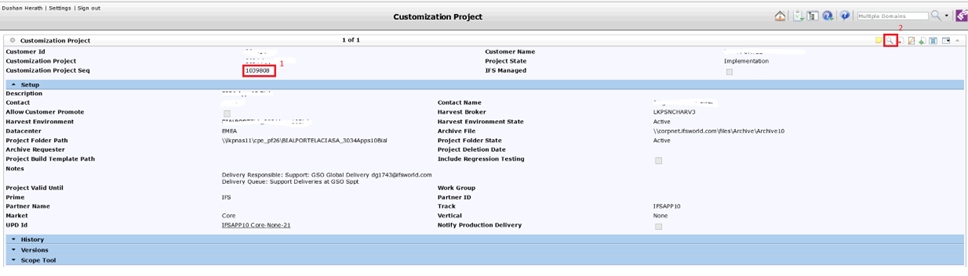
- Step 1
Copy customization Project Seq & Click Search Icon on top right corner.
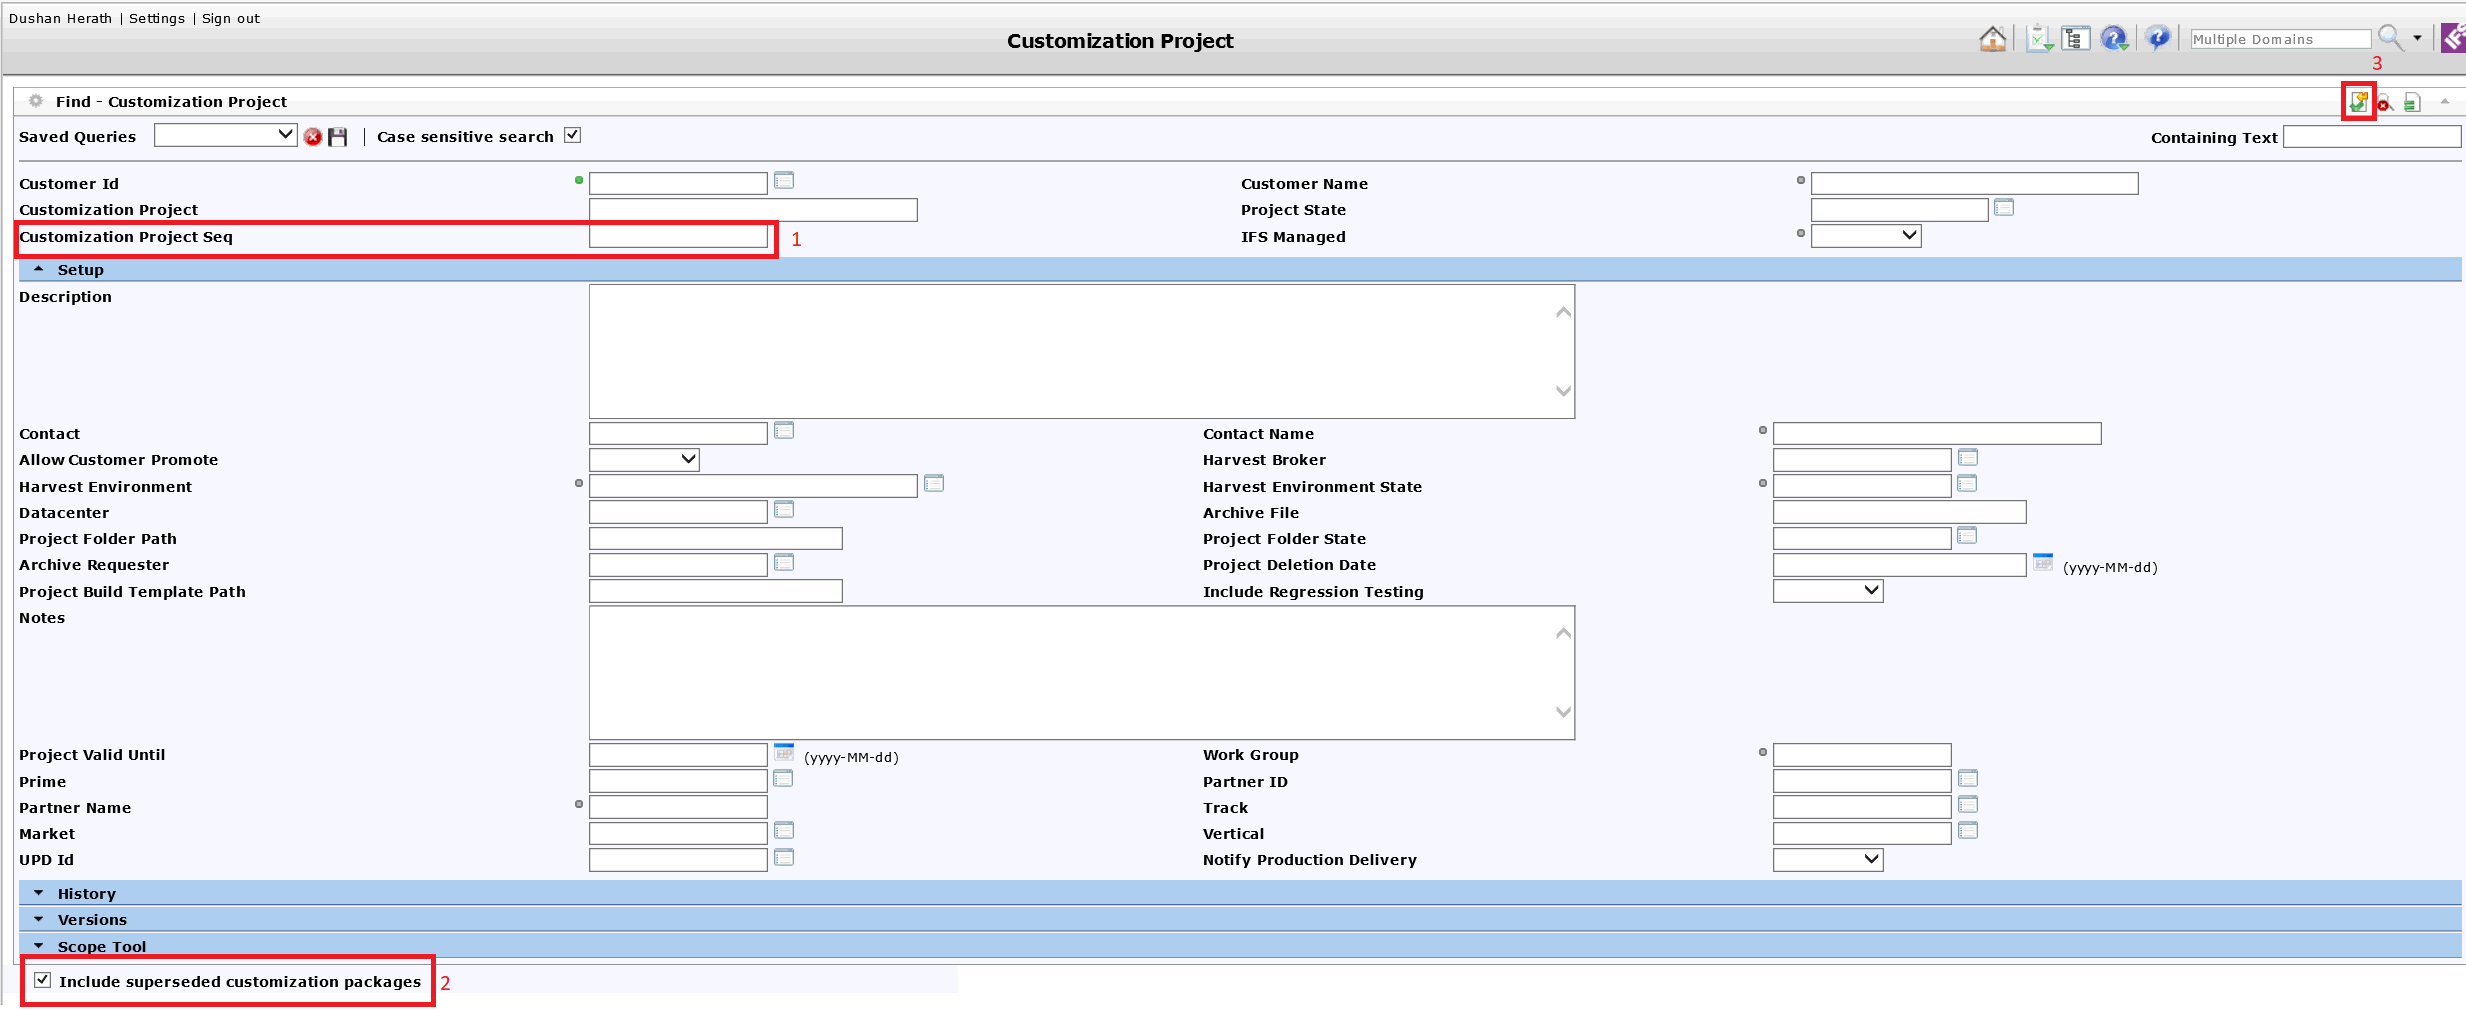
- Step 2
Paste copied Seq ID --> Put tick mark for “Include Superseded Customization Package” and click okay by clicking green colour “Right” symbol in top right corner. (Follow the below steps)
You can see there are 2 UPDs available in customization tab (one of them will be your current ongoing UPD under your username). Please copy those two IDs and save it somewhere. You must change those “Customization Type” from “UPD” to “Customization ”.
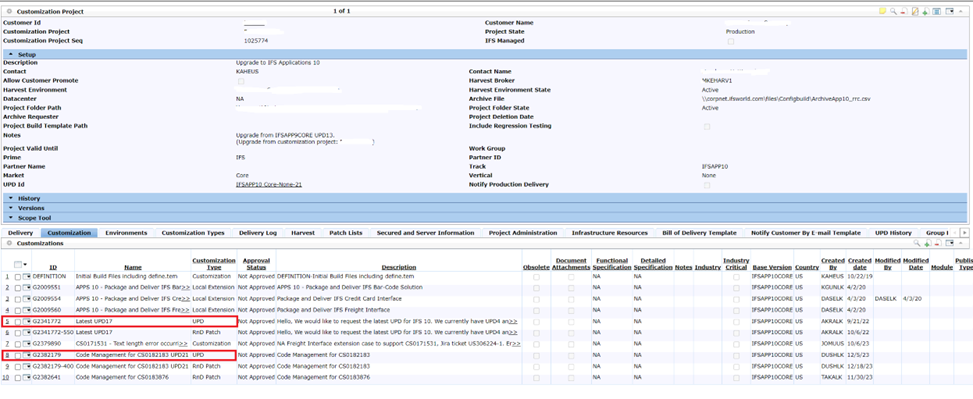
- Step 3
Go to Edit (in my case ID G2341772)
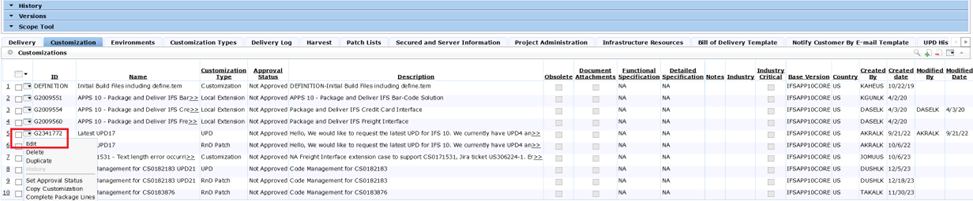
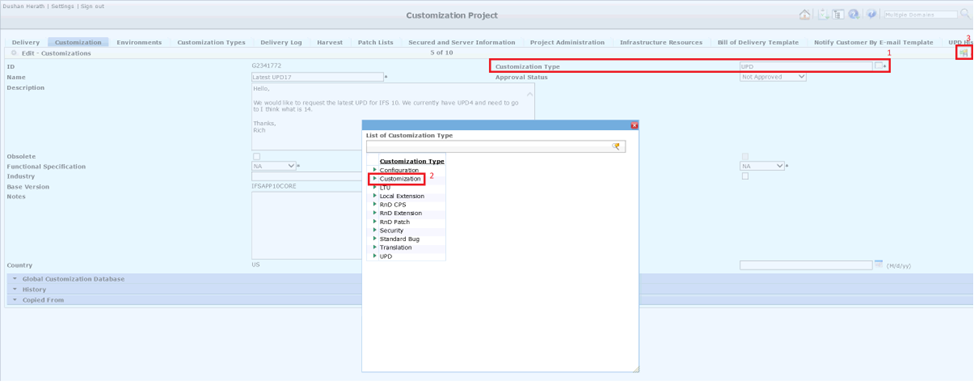
Change Customization type into “Customization” and save it by clicking green color “Right” button. Continue same step for other Customization ID. (in my case G2382179).
- Step 4
After that process you can simply edit the UPD ID by clicking edit button. Again, re open new Customisation Project --> Edit

Here is the edit window. Click UPD ID according to your requirement and Save it.
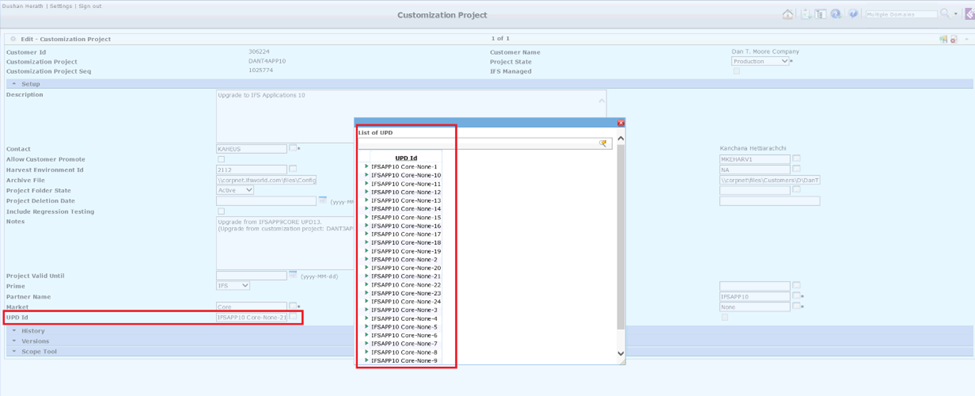
Now you can see UPD ID changed into “IFSAPP10 Core-None-20”

After changing the UPD ID in your current customization project, you must also update the customization type to "UPD" for the previously modified IDs like below image.
In this case, the Case IDs are G2341772 and G2382179 (Follow step 1,2,3 again for change).
