

To migrate data specifically for custom fields, follow the steps outlined below. After experimenting with multiple approaches, I have identified the most effective method for transferring data into custom fields. I hope this guide helps some of you resolve your challenges.
As usual, you need to create two migration jobs:
File Migration (CREATE_TABLE_FROM_FILE)
- Create the migration job in the standard manner. There are no special steps to follow for this process.
- Reference for creating a file migration job: Create File Migration Job.
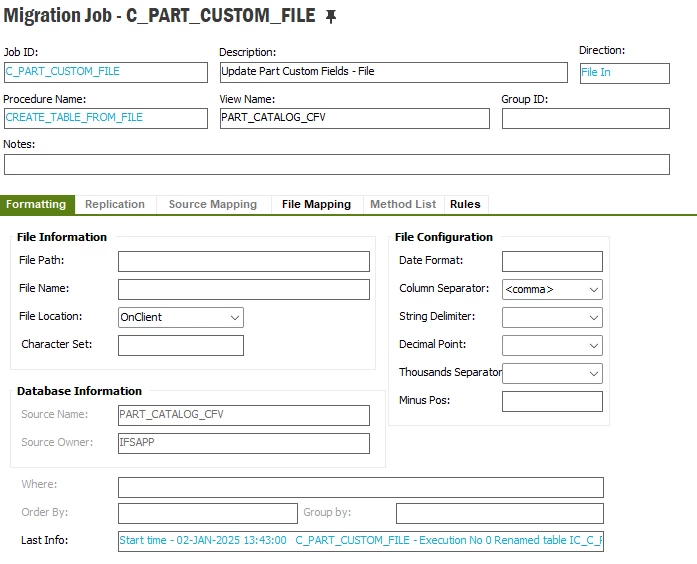
Here is the File Migration job created for this scenario, which you can use as a sample reference:

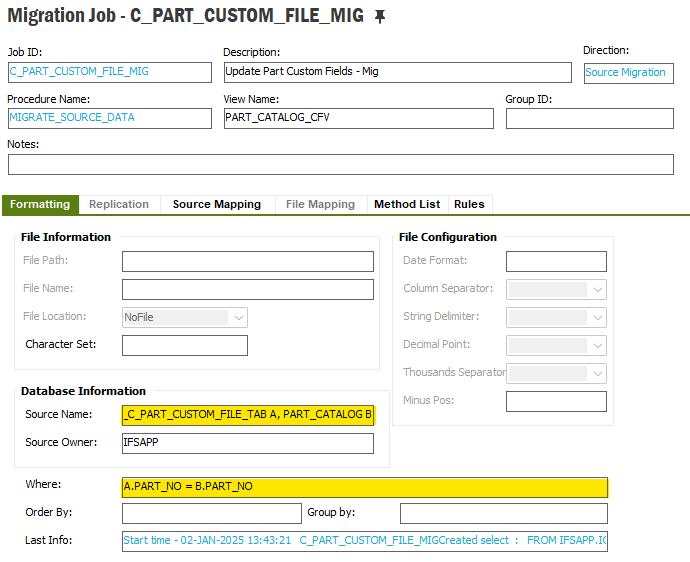
Source Migration (MIGRATE_SOURCE_DATA)
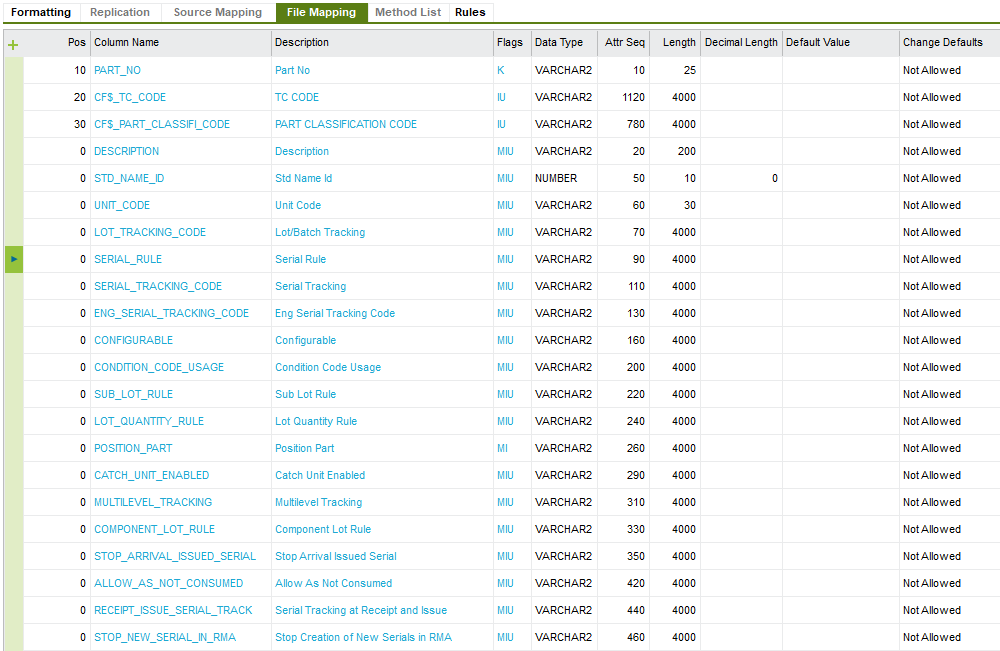
In this scenario, we are trying to migrate data into two custom fields created for the Part Window. The key identifier for this migration is the Part Number (PART_NO).
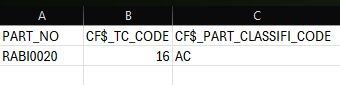
In the CSV (Excel) file, three columns are defined as follows:
Create the Migration Job:
In the Database Information section, include both the migrated file table (IC_PART_CUSTOM_TAB) and the main view (PART_CATALOG) of the custom fields (CFV). The primary purpose of adding the main view is to retrieve the OBJID, which is required as a parameter for the Part_Catalog_CFP.Cf_New__ method.
Migrated file table name creation:
IC_Name_Of_The_File_Migration_TAB
ex: IC_PART_CUSTOM_TAB
Connect the two tables by adding a WHERE clause as highlighted below.
Method List
- Add Intface_Method_List_API.Get_Objid_From_Key as the first method. This is a commonly used method that can be applied to your migration jobs as well. Alternatively, you can include this function in your API file if required (the function code will be attached at the end of this).
- This method will return the OBJID. Therefore, ensure that the New and Modify checkboxes are not selected.
- Add a second method to call the Cf_New function of CFP. Since there are no New_ or Modify_ functions defined in CFPs, leave the New and Modify checkboxes unselected for this method as well.

Then RMB on the second line and open the Method Attribute List and add Fixed Values to OBJID & ATTR_CF_:


| ATTR_CF_ | ATTR_ |
| OBJID_ | FUNCTION_RESULT@10 |
Source Mapping
Based on the view name specified in the header section, the Source Mapping section will automatically populate all the fields. However, ensure you remove any columns that are not relevant to this job.
Additionally, there are certain lines that assist in mapping method parameters.
As highlighted below, ensure to add the method parameters in the correct format:
- Remove unnecessary columns that do not apply to this migration job.
- Add the required method parameters with proper formatting, such as:
| METHOD10.VIEW_NAME_ | 'PART_CATALOG' |
| METHOD10.KEY_COLUMNS_ | 'PART_NO;' |
| METHOD10.KEY_VALUES_ | A.PART_NO||';' |
This ensures accurate mapping and avoids potential errors during the migration process.
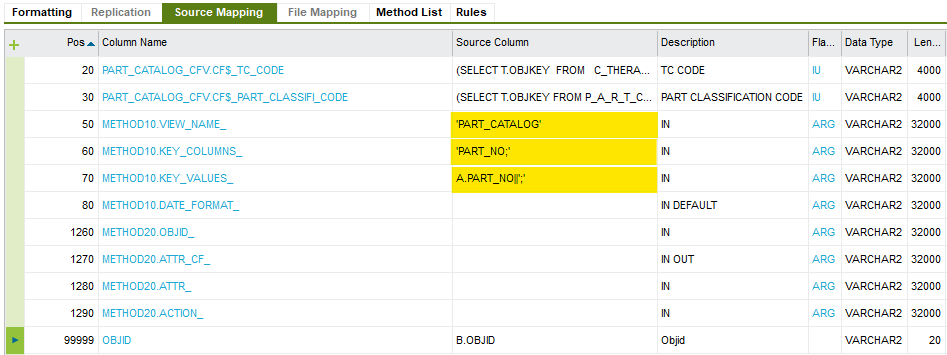
Next, map the relevant columns to the Source Column field using the corresponding List of Values (LOV).
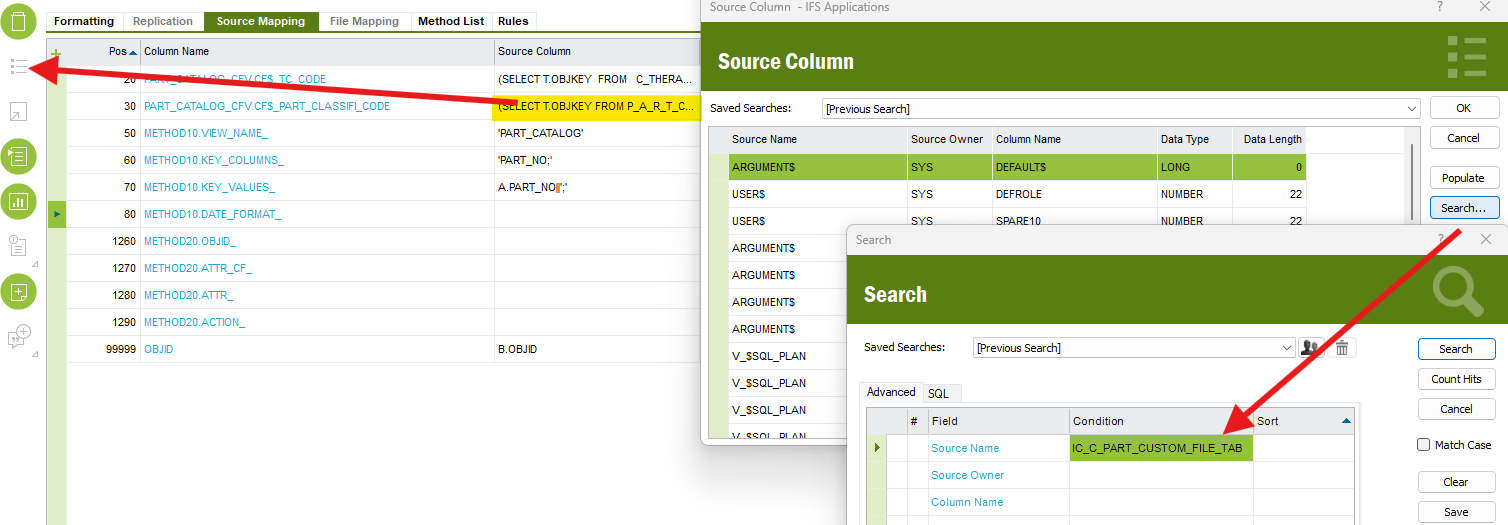
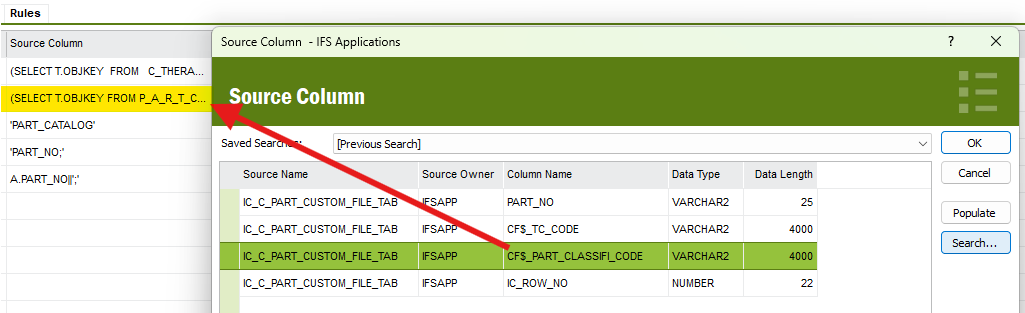
NOTE: You can also use subqueries in the Source Column to fetch data.
In this scenario, the user provides the client value in the Excel file, but in the application, it is a LOV field that maps to the OBJKEY. Therefore, we need to fetch the correct OBJKEY based on the provided client value and pass it through the migration job. To achieve this, the Source Column is updated with a subquery that retrieves the correct OBJKEY for the given client value.
For more details